How to Frame a Wall Like a Pro: A Comprehensive Guide for Michigan Homeowners

Posted on August 10, 2024August 10, 2024Categories Uncategorized  Leave a comment on How to Frame a Wall Like a Pro: A Comprehensive Guide for Michigan Homeowners

Hello, DIY enthusiasts and future builders! Whether you’re diving into a new construction project or tackling a renovation, framing a wall is a foundational skill that can make or break your project. Done correctly, it sets the stage for everything else, from drywall installation to the final finishes. This guide will walk you through the entire process of framing a wall, with detailed steps and tips to ensure you achieve a professional-quality result, all while adhering to Michigan building codes.

Essential Tools and Materials for Framing Walls

Before you start framing, gather your tools and materials. Having the right equipment and understanding their uses will streamline your project and help you work more efficiently.

Materials:

  1. Lumber (2x4s or 2x6s)
    • Purpose: The backbone of your wall structure. For most interior walls, 2x4s are standard, while 2x6s are preferred for exterior walls or when additional insulation is needed.
    • Benefits: Provides necessary support for vertical and horizontal loads, ensuring the wall’s strength and stability.
  2. Nails and Screws
    • Purpose: Fastening lumber components together. Framing nails are used for speed, whereas screws are preferred for their superior holding power.
    • Benefits: Nails are efficient for quick assembly, while screws offer a stronger connection, especially for load-bearing components like headers and corners.
  3. Construction Adhesive
    • Purpose: Applied between surfaces to bond them together. For example, it’s used between the bottom plate and the floor or the top plate and the ceiling.
    • Benefits: Enhances the strength of the connection, reduces noise transmission, and prevents gaps that can lead to structural weaknesses or air leaks.
  4. Drywall Backer (Plywood or Additional 2x4s)
    • Purpose: Provides extra support in areas where heavy fixtures or appliances will be mounted.
    • Benefits: Offers a robust surface for attaching drywall and fixtures, preventing sagging or damage.
  5. Fire Breaks (Horizontal 2x4s or Plywood)
    • Purpose: Installed horizontally between studs to enhance fire resistance.
    • Benefits: Helps slow the spread of fire through wall cavities, contributing to overall fire safety.

Step-by-Step Framing Process

Let’s break down the framing process into detailed, manageable steps. Each step is crucial for ensuring a successful outcome, and understanding these details will make your project smoother and more precise.

  1. Planning and Measuring
    • Laser-Level Layout:
      • Setup: Place the laser level on a stable surface and adjust it to project horizontal lines at the desired height.
      • Application: Use the laser lines to mark reference points on the floor and ceiling for both the top and bottom plates. This ensures your wall is level and straight.
    • Mark the Floor:
      • Chalk Line: Snap a chalk line along the laser mark on the floor where the bottom plate will be installed. This line acts as a guide for placing the bottom plate accurately.
      • Checking Alignment: Double-check the alignment using a tape measure and ensure it’s consistent with your laser level.
    • Mark the Ceiling:
      • Transferring Measurements: Use a measuring tape to transfer the floor measurements to the ceiling, aligning with the laser lines. This will help you place the top plate precisely.
  2. Cutting Your Lumber
    • Measure and Cut Plates:
      • Measuring: Measure the length required for both top and bottom plates based on the wall’s dimensions. Add extra length for any necessary adjustments.
      • Cutting: Use a miter saw to cut the plates to the exact length. Ensure your cuts are straight and clean for a proper fit.
    • Determine Stud Length:
      • Measuring Height: Measure the distance between the floor and ceiling, then subtract 3 inches to account for the thickness of the top and bottom plates.
      • Cutting Studs: Cut the studs to this length, making sure each is consistent for a uniform wall.
  3. Laying Out Your Wall
    • Laser-Guided Layout:
      • Positioning Plates: Place the top and bottom plates on the floor according to your laser-marked lines.
      • Mark Stud Locations: Use the laser level to project lines onto the plates where the studs will go, ensuring accuracy.
    • Start at 15 1/4″ for Stud Layout:
      • Why 15 1/4″? This measurement aligns with the standard 4-foot width of drywall sheets. It simplifies the installation process by centering the drywall on the studs, reducing waste and making it easier to secure.
      • Marking: Measure 15 1/4″ from one end of the plate and mark it. Continue marking every 16 inches from this initial point (15 1/4″, 31 1/4″, 47 1/4″, etc.) to indicate stud centers.
    • Mark Stud Positions:
      • Speed Square: Use a speed square to draw lines at each mark on the plates. These lines will guide you in placing and securing the studs.
      • Labeling: Mark the positions with an “X” to ensure you know where each stud will be installed.
  4. Pulling Square with Modern Techniques
    • Importance of Squaring:
      • Structural Integrity: A square frame ensures that the wall is structurally sound and that all components fit together correctly.
      • Alignment: Proper squaring prevents issues with drywall installation and other finishing processes.
    • Measuring Diagonals:
      • Measurement: Measure the distance between the opposite corners of the frame. Both measurements should be the same if the frame is square.
      • Pythagorean Theorem: For an 8-foot high wall, calculate the hypotenuse to ensure accuracy:962+962=9216+9216=18432≈135.7 inches\sqrt{96^2 + 96^2} = \sqrt{9216 + 9216} = \sqrt{18432} \approx 135.7 \text{ inches}962+962​=9216+9216​=18432​≈135.7 inches
    • Adjusting:
      • Fine-Tuning: If the diagonal measurements are not equal, adjust the corners until they match. This step ensures that your frame is perfectly square.
  5. Advanced Framing Techniques
    • Double Top Plate with Overlap:
      • On Load-Bearing Walls: Use a double top plate where the second plate overlaps the first by at least 24 inches. This technique provides extra strength and helps distribute loads more evenly.
      • On Partition Walls and Corners: Extend the top plate to cover intersecting walls. This creates a continuous load-bearing surface, ensuring the stability of the wall.
    • Drywall Backer:
      • High-Stress Areas: Identify areas where heavy fixtures, cabinets, or appliances will be mounted.
      • Installation: Install additional 2x4s or plywood between studs at these locations. This provides a solid attachment point for drywall and fixtures, preventing sagging or damage.
    • Fire Breaks:
      • Installation: Place horizontal fire breaks between studs to meet fire-resistance codes. Typically, these should be installed at intervals of 8 feet or as specified by local regulations.
      • Material: Use horizontal 2x4s or plywood cut to fit snugly between studs, securing them with nails or screws.
    • Framing for Doors and Windows:
      • King Studs: Install vertical studs on either side of the door or window opening to support the wall structure.
      • Cripple Studs: Place these above and below the opening to transfer loads and provide additional support.
      • Nailer Studs: Add horizontal nailers at the top and bottom of the opening to provide a solid surface for attaching drywall and trim.
  6. Stacking Studs: Why and How
    • Why Stack Studs? Aligning studs with joists or rafters ensures that loads are transferred directly down through the wall, enhancing overall stability and reducing the risk of wall failure.
    • How to Stack Studs:
      • Laser Level: Project a vertical line from the joists down to the top plate using your laser level.
      • Alignment: Position each stud directly beneath a joist or rafter. Adjust as necessary to ensure that the studs are properly aligned and spaced.
  7. Breaking Top Plate Seams
    • Why Break Seams? Staggering the seams of your top plates helps distribute stress evenly across the wall, preventing weak points and ensuring a stronger, more stable structure.
    • Minimum Distance: Maintain at least 24 to 48 inches between seams on the top plate to avoid creating concentrated stress points and to provide structural integrity.
  8. Final Adjustments and Securing
    • Re-Check Squareness and Plumb:
      • Verification: Use a laser level and a carpenter’s level to ensure that the wall is both plumb (vertically straight) and square (at 90 degrees). This step is crucial for a successful framing job.
    • Install Blocking:
      • Where Needed: Add horizontal blocking between studs in areas that will bear weight or where fixtures will be mounted. This adds strength and stability.
      • Metal Strapping: Use metal strapping if extra reinforcement is needed for stability.
    • Anchor the Wall:
      • Seismic Zones: In areas prone to seismic activity, use anchor bolts or straps to secure the wall to the foundation and ceiling joists. This additional step enhances the wall’s stability and resistance to movement.

Safety Precautions

  • Wear Protective Gear: Always use safety glasses, ear protection, and gloves when operating power tools to protect yourself from debris and noise.
  • Tool Safety: Ensure all tools are in good working order and that you are familiar with their operation to prevent accidents and achieve accurate results.
  • Safe Lifting Practices: Use proper lifting techniques and seek help with heavy or awkward frames to avoid injury.

Code Compliance in Michigan

  1. Framing Codes: Adhere to the Michigan Residential Code (MRC) for specifications on load-bearing walls, stud spacing, and material requirements to ensure your construction meets local standards.
  2. Fire Safety: Install fire breaks and frame openings in accordance with local fire safety codes to ensure compliance and enhance building safety.
  3. Insulation: Frame walls to accommodate insulation requirements as specified by Michigan’s energy codes, contributing to energy efficiency and comfort.
  4. Permits and Inspections: Obtain necessary permits and schedule inspections as required by your local municipality to ensure that your work complies with all regulations and standards.

Conclusion

Framing a wall may seem daunting, but with a clear understanding of the process and attention to detail, you can achieve professional results. By following these comprehensive steps and adhering to Michigan’s building codes, you’ll create a strong, stable, and code-compliant wall. Remember, careful planning, precise execution, and compliance with safety standards are key to a successful framing project.

Happy framing, and may your project be a great success!

Keywords: wall framing, Michigan building codes, framing techniques, construction adhesive, drywall backer, fire breaks, door and window framing, stud alignment, top plate seams
The Perfect Paint Job: A Step-by-Step Guide for DIY Home Improvement

Posted on August 8, 2024August 8, 2024Categories Uncategorized  Leave a comment on The Perfect Paint Job: A Step-by-Step Guide for DIY Home Improvement

Have you ever walked into a freshly painted room and marveled at how it transformed the space? A new coat of paint can breathe life into any area, but achieving that flawless finish requires more than just a brush and some paint. As someone who’s tackled numerous interior painting projects (and learned from plenty of mistakes!), I can tell you that the key to a professional-looking paint job lies in careful preparation and attention to detail.

Follow this comprehensive DIY painting guide to ensure your next home improvement project is a success. Let’s dive in!

Step 1: Gather Your Painting Supplies

Preparation is crucial for any home painting project. Trust me, there’s nothing worse than being elbow-deep in paint and realizing you forgot something essential! Here’s what you’ll need for your DIY paint job:

Choosing the Right Paint

The right paint makes all the difference in your home improvement project. Here’s a quick rundown of paint sheens for interior painting:

  • Flat/Matte: Best for low-traffic areas and hiding wall imperfections
  • Eggshell: Ideal for living rooms and dining areas, offering a subtle sheen
  • Satin: Perfect for high-traffic areas like kitchens and bathrooms, easy to clean
  • Semi-Gloss: Great for trim, doors, and cabinets, providing a durable finish
  • Gloss: Often used for furniture or surfaces that need frequent cleaning

Pro tip: Many modern paints include primer, but you might still need a separate primer for dark colors or new surfaces when painting walls.

Other Essential Painting Supplies

  • Wall primer
  • Surface sealer (for problematic surfaces)
  • Paint brushes and rollers
  • Painter’s tape for clean edges
  • Drop cloths to protect floors
  • Caulk and spackling for wall repairs
  • Sanding supplies for smooth surfaces
  • Paint filter for smooth application
  • Stir sticks and paint trays

Step 2: Prepare Your Space for Painting

Now that you have your supplies, it’s time to prep the area. This step is often overlooked in DIY painting, but it’s crucial for a professional finish.

  1. Move furniture out or cover it with drop cloths
  2. Clean the walls thoroughly to ensure paint adhesion
  3. Examine and prepare the trim:
    • Fill holes and cracks with Durabond 20-minute mud
    • Sand smooth with 120-grit sandpaper
    • Caulk gaps between trim and walls for a seamless look

Personal experience: I once skipped proper wall cleaning and ended up with paint that wouldn’t adhere properly. Learn from my mistake – don’t rush this crucial step in your home improvement project!

Step 3: Prime the Walls and Trim

Priming is essential for new surfaces, dramatic color changes, or humid environments. It creates a smooth base for your paint and ensures the color looks its best in your interior design.

For problematic surfaces:

  1. Sand peeling areas with 120-grit sandpaper
  2. Apply a surface sealer to prevent future issues
  3. Prime the area for best paint adhesion

Don’t forget to sand after priming for an ultra-smooth finish on your walls!

Step 4: Master the Art of Taping and Cutting In

Before you start applying paint to your walls, it’s crucial to understand two key techniques: taping and cutting in. These skills will give your paint job clean lines and a professional finish.

Taping Tips for Clean Lines

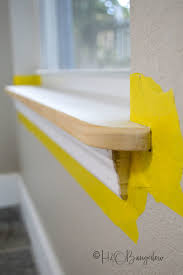
  1. Choose the right tape: Use high-quality painter’s tape, not masking tape. Brands like FrogTape or ScotchBlue are designed to prevent paint bleed.
  2. Apply tape to dry, clean surfaces: Ensure the area is dust-free and completely dry before applying tape.
  3. Press firmly: Use a putty knife or credit card to press down the edges of the tape, creating a tight seal.
  4. Remove tape at the right time: Pull off the tape while the paint is still slightly wet, or wait until it’s completely dry. Removing semi-dry paint can cause peeling.
  5. Pull at a 45-degree angle: When removing tape, pull it back on itself at a 45-degree angle for the cleanest removal.
  6. Consider taping techniques for textured walls: For textured surfaces, run a thin bead of caulk along the edge of the tape, then smooth it with your finger. This creates a seal that prevents paint from seeping under the tape.

Cutting In Like a Pro

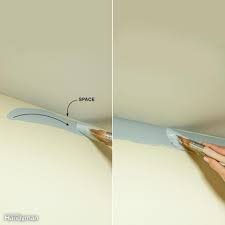
Cutting in refers to painting the edges of your walls where they meet the ceiling, baseboards, or adjacent walls. It’s a crucial skill for achieving crisp, clean lines without relying on tape.

  1. Use the right brush: A 2-2.5 inch angled brush gives you the most control for cutting in.
  2. Load your brush properly: Dip only about 1/3 of the bristles into the paint, then tap (don’t wipe) the brush on the side of the can to remove excess.
  3. Create a paint reservoir: Start about 1/2 inch away from the edge you’re cutting in. Apply paint in a 2-3 inch strip parallel to the edge.
  4. Work in sections: Paint about 2-3 feet at a time, keeping a wet edge.
  5. Steady your hand: Rest your hand on the wall for stability as you paint. Use your pinky as a guide along the edge for straighter lines.
  6. Feather the edges: As you paint away from the edge, lightly feather out the paint to blend it with the area you’ll be rolling.
  7. Practice makes perfect: Don’t get discouraged if your first attempts aren’t flawless. Cutting in is a skill that improves with practice.

Pro tip: If you’re new to painting or working in a particularly tricky area, you can use both taping and cutting in techniques. Apply tape, then cut in along the tape edge for extra insurance against paint bleed.

Step 5: Roll the Walls for Even Paint Coverage

This is where the transformation really begins! After cutting in, it’s time to roll the larger wall areas.

Tips for rolling walls:

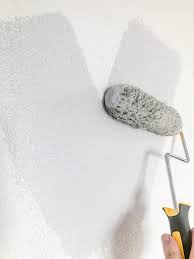
  • Use a “W” or “M” pattern for even paint coverage
  • Avoid overloading the roller to prevent drips
  • Keep a wet edge to prevent lap marks in your paint job

Personal tip: An extension pole for your roller is a game-changer for painting high walls and ceilings. Your back will thank you during your DIY project!

Step 6: Sand Between Coats for a Smooth Finish

For a truly professional paint job, don’t skip this step! After the first coat dries:

  1. Lightly sand with 120-grit sandpaper
  2. Wipe down surfaces with a damp cloth to remove dust
  3. Apply the next coat of paint for full coverage

Step 7: Apply Additional Coats of Paint

Most walls need at least two coats of paint for full coverage. Be patient and let each coat dry completely before applying the next for the best results.

Step 8: Clean Up After Painting

Once you’re satisfied with your paint job and everything’s dry:

  1. Carefully remove painter’s tape for clean edges
  2. Clean brushes and rollers thoroughly
  3. Dispose of or store leftover paint properly for future touch-ups

Conclusion: Enjoy Your Freshly Painted Space!

With proper preparation and the right techniques, you can achieve a professional-quality paint job that revitalizes your home interior. Take your time, follow these steps, and soon you’ll be admiring your DIY handiwork with pride.

Remember, practice makes perfect in home improvement. Each painting project you tackle will improve your skills. So don’t be discouraged if your first attempt isn’t flawless – mine certainly wasn’t!


Quick Checklist for the Perfect DIY Paint Job:

  • Gather all painting supplies before starting
  • Thoroughly prepare the space and surfaces
  • Prime walls when necessary
  • Master taping and cutting in techniques
  • Roll walls using proper technique
  • Sand between coats for a smooth finish
  • Apply multiple thin coats rather than one thick coat
  • Clean up properly to preserve your painting tools

Happy painting and enjoy your freshly updated home interior!

Embrace Spring Renewal: Discover Exclusive Savings Across All Categories at Chum’s Kitchen & Bath!

Posted on April 6, 2024April 6, 2024Categories Appliances, Bathroom, Fans, Flooring, Hardware, HVAC, Kitchen, OutdoorTags ,   Leave a comment on Embrace Spring Renewal: Discover Exclusive Savings Across All Categories at Chum’s Kitchen & Bath!

As the world outside bursts into bloom, there’s a stirring within us—a desire to refresh, renew, and revitalize. Spring is a season of transformation, a time when we shed the layers of winter and embrace the promise of new beginnings. And what better place to start this journey of renewal than in the heart of our homes—the kitchen and bath.

In the sanctuary of our bathrooms, amidst the gentle trickle of water and the soft glow of candlelight, we find solace and serenity. It’s here, in these intimate spaces, that we wash away the stresses of the day and emerge feeling rejuvenated, ready to face whatever tomorrow may bring. From the soothing warmth of a luxurious bath to the invigorating spray of a rainfall shower, our bathroom fixtures are more than just functional—they’re essential elements of self-care, designed to nurture both body and soul.

And then there’s the kitchen—the bustling hub where meals are prepared, conversations flow, and memories are made. In this vibrant space, where the aroma of freshly baked bread mingles with the laughter of loved ones, every detail matters. From the sleek lines of our faucets to the durability of our sinks, our kitchen fixtures are crafted with both style and substance in mind. They’re the foundation upon which culinary masterpieces are built, the tools that empower home cooks to unleash their creativity and embrace the joy of cooking.

At Chum’s Kitchen & Bath, we understand the transformative power of well-designed spaces. That’s why we’re thrilled to offer exclusive savings on our premium fixtures, just in time for spring. Whether you’re dreaming of a spa-inspired bathroom retreat or a gourmet kitchen worthy of a five-star chef, we have everything you need to bring your vision to life.

So, as the world outside awakens from its winter slumber, why not take this opportunity to breathe new life into your home? Join us on this journey of renewal, and let Chum’s Kitchen & Bath be your trusted partner every step of the way.

Step into the season of renewal with Chum’s Kitchen & Bath, your one-stop destination for all things home improvement. As spring breathes new life into the world around us, it’s the perfect time to refresh your living spaces and embrace the beauty of the season. From sleek kitchen appliances to luxurious bathroom fixtures, we have everything you need to transform your home into a haven of comfort and style. Explore our exclusive sale across a wide range of categories and elevate every corner of your home with premium products and unbeatable savings.

Appliances: Elevate Your Kitchen Experience

Upgrade your culinary haven with our premium kitchen appliances designed to make cooking a joyous experience. From state-of-the-art refrigerators and ovens to stylish dishwashers and microwaves, we offer a wide selection of appliances that combine innovation with efficiency. Discover the perfect additions to your kitchen and unlock new possibilities for culinary creativity.

Bathroom: Create Your Personal Oasis

Indulge in the ultimate relaxation experience with our exquisite collection of bathroom fixtures. From elegant faucets and stylish vanities to spa-inspired shower systems, we have everything you need to transform your bathroom into a serene retreat. Pamper yourself with luxury and style, and elevate your daily routine with our premium bathroom solutions.

Fans: Stay Cool and Comfortable

Beat the heat this spring with our high-performance ceiling fans and ventilation solutions. Whether you’re looking to enhance air circulation in your living spaces or create a cool breeze on your outdoor patio, we have a wide range of fans to suit every need and style. Stay comfortable and refreshed as the temperatures rise, and enjoy the soothing airflow of our quality fans.

Flooring: Set the Foundation for Style

Upgrade your home’s flooring and set the stage for a fresh new look this spring. Explore our extensive selection of flooring options, including hardwood, laminate, tile, and more. From classic designs to modern patterns, we have flooring solutions to complement any aesthetic and enhance the beauty of your living spaces.

Hardware: Add the Finishing Touches

Enhance the functionality and style of your home with our premium hardware accessories. From door handles and cabinet knobs to hinges and hooks, we offer a wide range of hardware options to add the perfect finishing touches to your interiors. Elevate every room with our stylish and durable hardware solutions.

HVAC: Maintain Comfort Year-Round

Ensure your home stays comfortable year-round with our top-of-the-line HVAC systems and services. From air conditioning units to heating systems, we provide reliable HVAC solutions tailored to your specific needs. Stay cozy in the winter, cool in the summer, and enjoy optimal indoor air quality with our professional HVAC services.

Outdoor: Transform Your Outdoor Spaces

Extend your living spaces outdoors and create an oasis of relaxation and entertainment with our outdoor solutions. From durable patio furniture and stylish decor to high-performance grills and outdoor kitchens, we have everything you need to elevate your outdoor experience. Embrace the beauty of nature and make the most of your outdoor spaces this spring.

Experience the Chum’s Kitchen & Bath Difference

At Chum’s Kitchen & Bath, we are committed to providing our customers with exceptional products, expert guidance, and unmatched savings. With our extensive selection of premium home improvement solutions, you can trust us to help you bring your vision to life and create the home of your dreams. Shop our exclusive spring sale today and discover the difference quality and craftsmanship can make in your living spaces.

Chums Kitchen & Bath: Where Dreams Meet Reality

Posted on April 6, 2024April 6, 2024Categories Appliances, Bathroom, Fans, Flooring, Hardware, HVAC, Kitchen, Outdoor, UncategorizedTags , , 2 Comments on Chums Kitchen & Bath: Where Dreams Meet Reality

In the heart of every renovation project lies a story—a tale of dreams, challenges, and the human spirit’s resilience. At Chums Kitchen & Bath, we’re not just craftsmen; we’re storytellers, weaving narratives of hope, perseverance, and the beauty found in life’s imperfect moments. Join us as we take you on a journey—a journey filled with laughter, tears, and the raw, unfiltered essence of what it means to build dreams from the ground up.

A Journey of Discovery

Close your eyes and picture a young dreamer, venturing into the wilderness of the Appalachian Trail—a backpack slung over his shoulders, dreams dancing in his eyes. It was here, amidst the towering trees and winding paths, that he discovered the true meaning of resilience, determination, and the beauty found in embracing life’s unexpected twists and turns.

From Brushes to Blueprints

As the years passed, our journey led us from painting walls to crafting blueprints, from framing structures to designing dream kitchens and baths. But make no mistake; it wasn’t always smooth sailing. There were moments of doubt, of frustration, and of lessons learned the hard way. Yet, it was in those moments of struggle that we found our strength, our creativity, and our unwavering commitment to turning dreams into reality.

Turning Setbacks into Successes

Ah, the kitchen renovation that almost wasn’t. What started as a vision of culinary bliss quickly turned into a whirlwind of challenges—delays, unexpected expenses, and more than a few moments of doubt. But with every setback came a silver lining—a chance to dig deeper, think outside the box, and ultimately, create something even more beautiful than we had imagined.

The Birth of a Dream: Chums Custom Remodel

Our journey began with Chums Custom Remodel—a humble beginning sparked by the completion of the Appalachian Trail. What started as a personal endeavor to bring dreams to life has now blossomed into a passion to provide affordable products that facilitate DIY or professional renovations. Today, we proudly stand as Chums Kitchen & Bath, a name that reflects our commitment to creating spaces where dreams thrive.

Inviting You into Our Story

So, come, dear reader, join us on this journey of highs and lows, of dreams realized and challenges overcome. Whether you’re embarking on your own renovation adventure or simply seeking a bit of inspiration, know that you’re not alone. We’re here to share our stories, to lend a helping hand, and to remind you that no matter how daunting the task may seem, there’s always beauty to be found in the journey itself.

Welcome to Chums Kitchen & Bath, where every project is a labor of love, every setback is a chance to grow, and every dream is worth fighting for.

Let’s build something beautiful, together.